The “User Profile Service Failed the Logon” error doesn’t let you sign in, making it trickier to resolve. It can occur for a number of reasons, including a corrupt NTUSER.DAT file. Here’s how I fixed it on my Windows PC.
Enable the Built-In Admin Account Using WinRE
The first thing you should do is enable the built-in administrator account if you cannot log in using your account. All other fixes will be impossible to execute without this hidden account.
Traditional methods to enable the admin account won’t work here. However, you can use the Windows Recovery Environment (WinRE) to access Command Prompt and modify the registry to enable the account.
Follow these steps to open CMD via WinRE:
- Click the Power icon.
- Hold the Shift key and click the Restart option.
- After your PC restarts, click Continue.
-
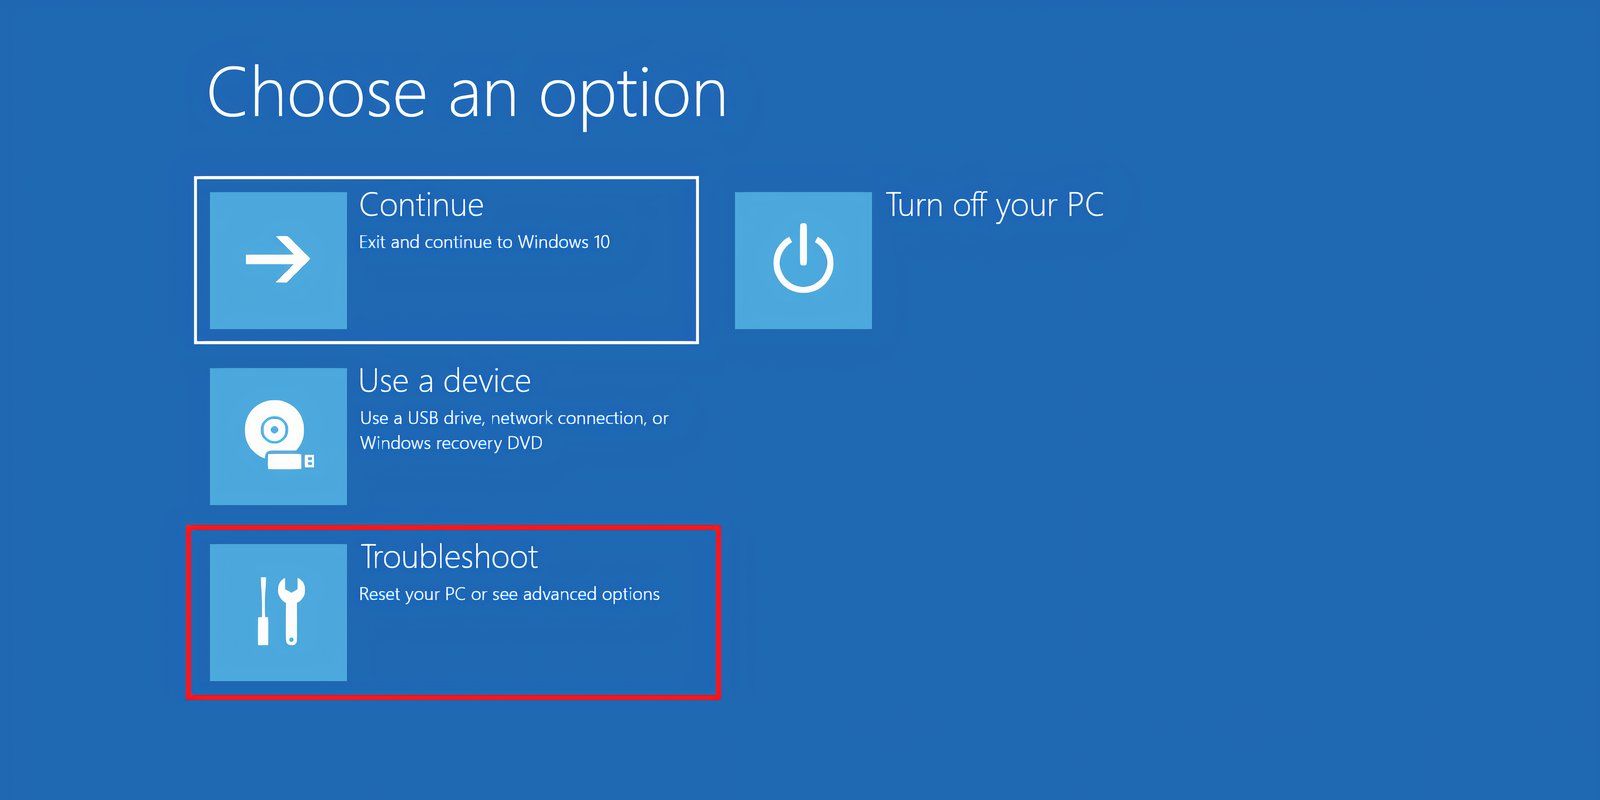
Select Troubleshoot.
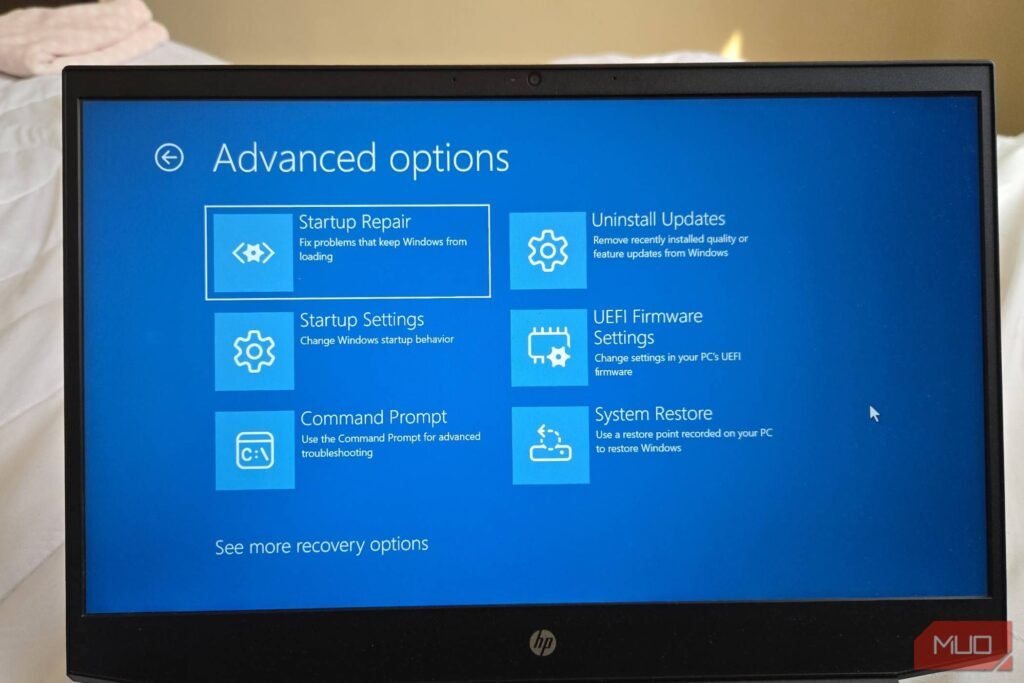
- Select Advanced Options > Command Prompt.
- Type regedit in the Command Prompt window and press Enter.

Now, modify the registry entries:
- Click on the HKEY_LOCAL_MACHINE key in the left pane.
- Click on File > Load Hive.
-
Select This PC option.
- Click on Windows > System 32 > config folder.
-
Find the SAM file and double-click on it.
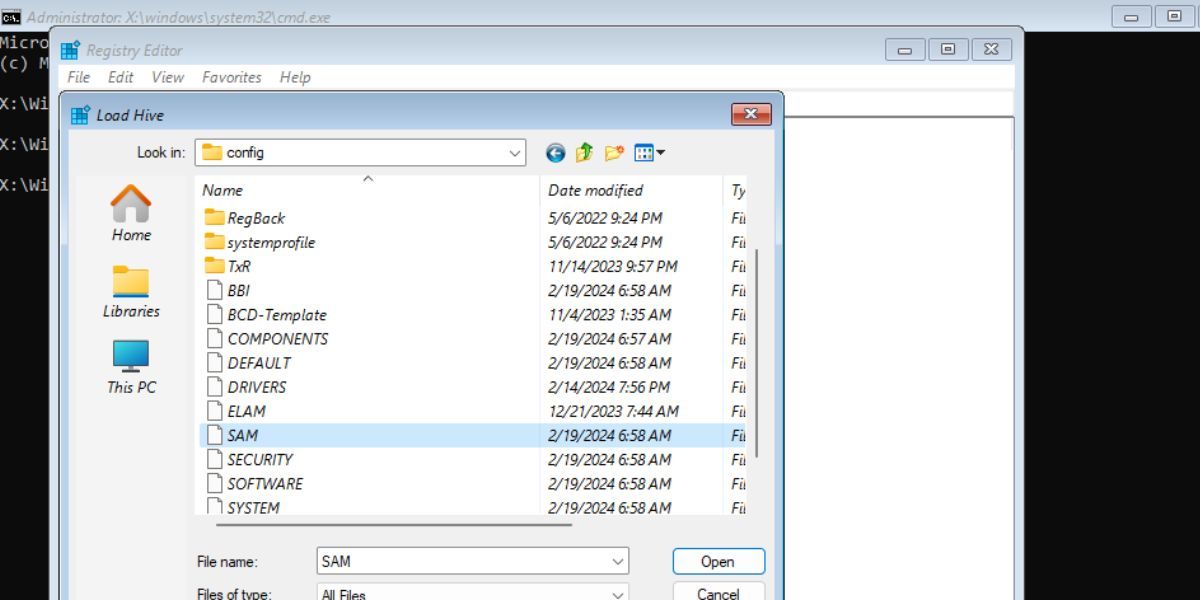
- Name the key REM_SAM and click on OK.
-
Navigate to the following registry key:
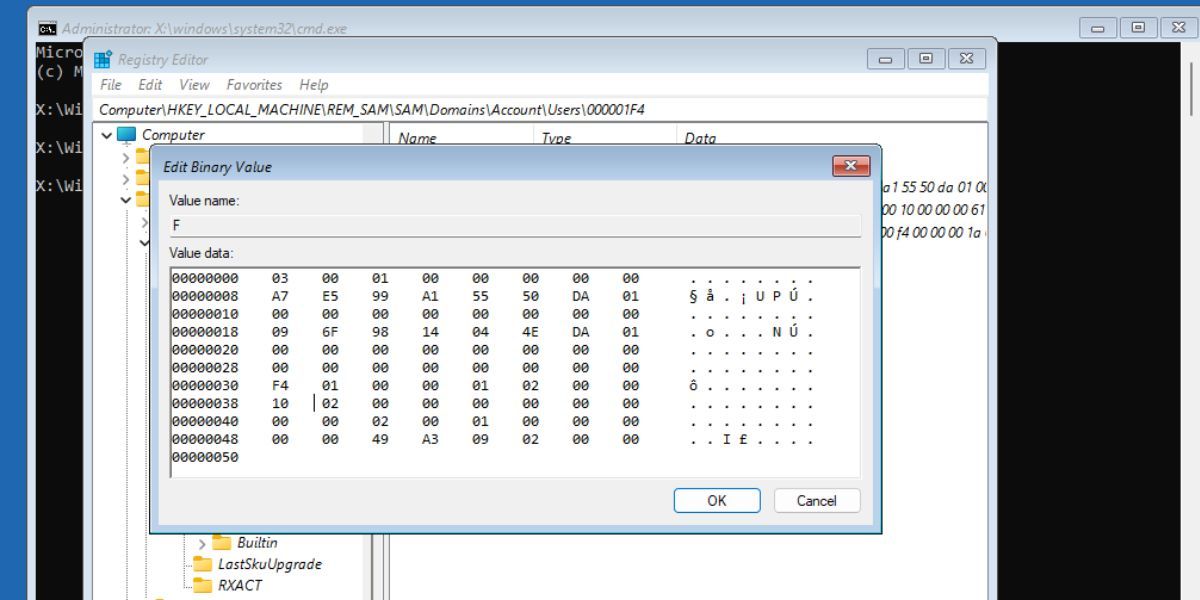
HKEY_LOCAL_MACHINE\REM_SAM\SAM\Domains\Account\Users\000001F4 - Double-click on the F binary value.
- Go to the 00000038 entry in the first row.
- Modify the value 11 in the second column of the 00000038 row to 10.
- Click on OK and close the Registry Editor.
- Exit the Command Prompt window.
- Click on Continue to boot to the lock screen. You will see an additional administrator account on the lock screen.


Boot Into Safe Mode
After enabling the built-in administrator account, boot Windows into Safe Mode. This mode boots Windows with the bare minimum features and programs that it needs to function.
Here’s how to do it:
- Power up your computer as you normally would.
- When you reach the Sign In screen, hold down Shift and go to Power > Restart.
-
Select Troubleshoot.
- Click on Advanced Options > Startup Settings > Restart.
- After your computer reboots, click on Safe Mode with Networking.
- Your computer will restart in Safe Mode.
Log in to the administrator account and then proceed with the methods mentioned below.
1. Replace the NTUSER.DAT File
The NTUSER.DAT file stores data about your user account. However, if it becomes corrupted, you must replace it. Log in to the administrator account that you enabled previously. Then repeat the following steps:
- Press Win + E to open File Explorer.
-
Click View > Show > Hidden items.

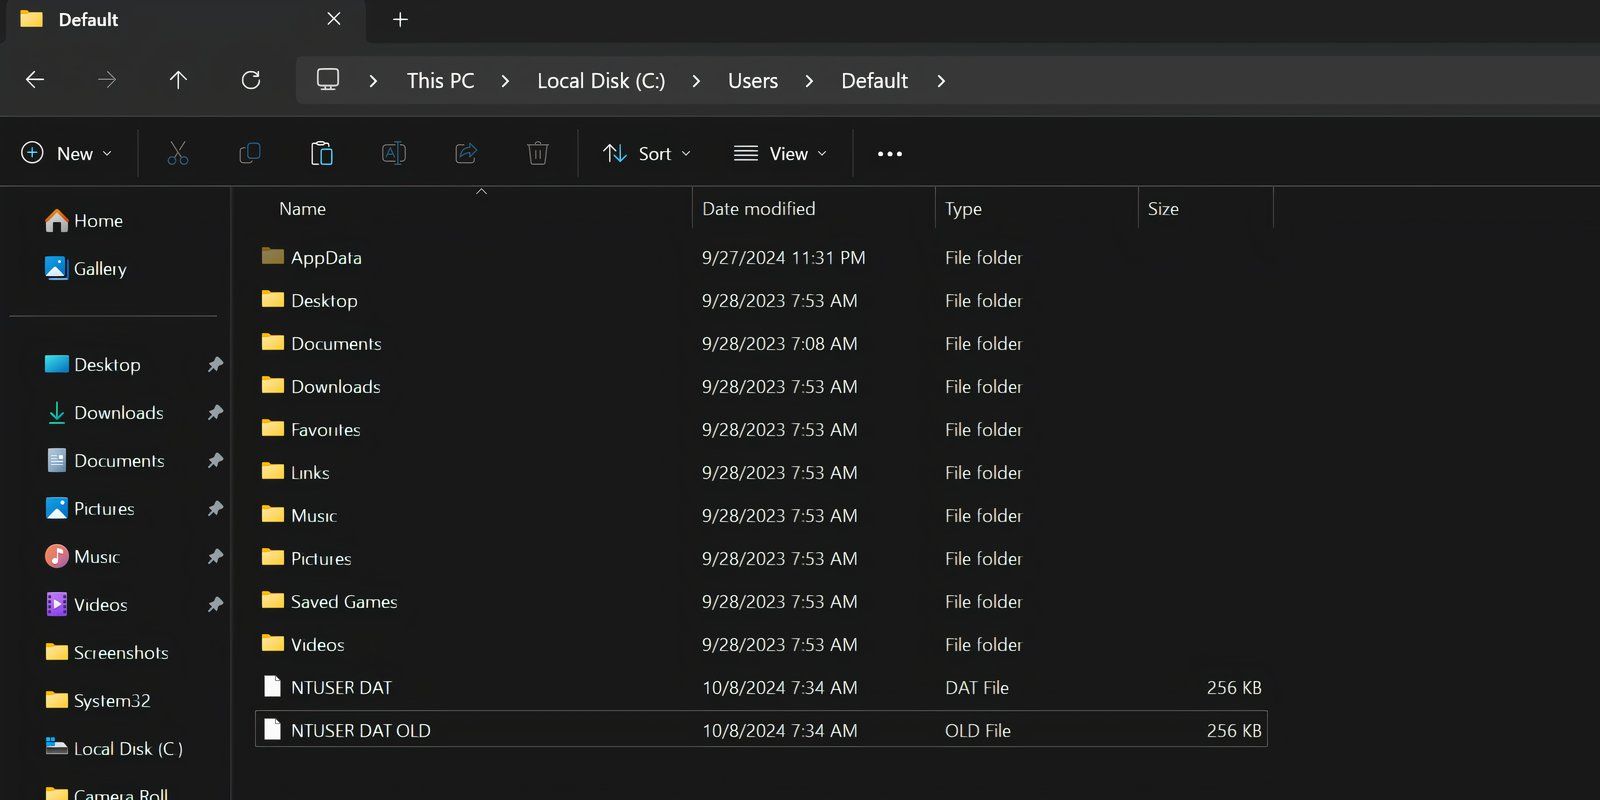
- Open the Default folder. Right-click the NTUSER.DAT file and rename it to ‘NTUSER.DAT.OLD’.
- Press Backspace. Go to the Administrator folder and copy the NTUSER.DAT File.
-
Revisit the Default folder and paste the copied file there.
- Restart your PC to apply the changes.


2. Use SFC to Scan for Corrupt Files
The most likely cause of the “User Profile Service Failed the Logon” error is a corrupt user file. This can happen for various reasons, ranging from antivirus software scanning upon boot to a power cut while powering on your computer.
Fortunately, Windows 10 and 11’s utilities can help you find and fix corrupt Windows files automatically using the System File Checker (SFC) tool in Command Prompt.

- Open Command Prompt with administrator privileges.
- Type sfc /scannow and press Enter.
- It will scan your PC for corrupt files and automatically fix them.
- After the scan is complete, reboot your computer and try logging in again.
3. Restore Your Computer to an Earlier State
System Restore lets you roll back changes to your computer and restore it to an earlier point in time. Before proceeding further, you should know that the feature is not enabled by default, and you have to manually create restore points unless you configure Windows to create daily restore points.
If you created a restore point before the error appeared, follow these steps:

- Press Windows key + R to launch the Run dialog.
- In the Run box, type rstrui.exe and hit Enter.
- Click on Next and choose a restore point from the list.
- Proceed with the on-screen instructions and click Finish.
- Windows will restore itself to an earlier state, and you should now be able to log in without any hassles.
4. Change Registry Configuration
Another way to tackle the “User Profile Service Failed the Logon” error is to make some changes to the Registry. This is an advanced troubleshooting method, and I suggest creating a System Restore point before proceeding further.
Repeat the following steps:

- Press Windows key + R to open the Run dialog box. Type regedit and press Enter.
-
In the Registry Editor, using the navigation bar on the left, go to:
HKEY_LOCAL_MACHINE\Software\Microsoft\Windows NT\Current Version\Profile List - Here, you should see two files with the same name, but one will have .bak as an extension.
- Right-click on the file with the .bak extension and select Rename. Remove the .bak extension while leaving the filename untouched, and press Enter.
- Now, right-click on the file that didn’t originally have the .bak extension and add .bak at the end of it.
- In the folder that has the renamed file from step 5, right-click on State, then select Modify.
- Change the value in Value data from 8000 to 0 (zero).
- After this, right-click on the RefCount entry and change the value in Value data to 0 (zero).
- Confirm the changes and close the Registry Editor.
- Reboot your computer and log in.
What if You Don’t Find a .bak File in the Registry Editor?
It is unlikely, but your computer may not have created a file with the .bak extension. In this case, open Windows Explorer and go to:
C:\Users\Default\AppData\Local\Application Data
If you find another folder named Application Data under the one you’re in, delete it and reboot your computer. It should fix the problem.
5. Enable the User Profile Service
In certain instances, the User Profile service itself may be disabled. Usually, a third-party application is the culprit. Luckily, you can enable it by running a simple command in the Command Prompt window:

- Boot your computer into Safe Mode.
- In the Start menu search bar, type cmd. From the search results, right-click on Command Prompt > Run as administrator.
- In the Command Prompt window, type sc config ProfSvc start= auto and press Enter.
- After this, type sc start ProfSvc, and press Enter.
- Close Command Prompt and reboot your computer.
Some of these methods are useful in diagnosing many other common Windows errors as well. So, it’s useful if you keep them in mind when you experience other issues on your computer.